Posted in Windows Powershell | No Comment | 2,138 views | 23/03/2013 08:30
Merhaba,
Portal yapımı sırasında kullandığım kodlar aşağıda:
New-SQLDatabaseBackup:
1
2
3
4
5
6
7
8
9
10
11
12
13
14
15
16
17
18
19
20
21
22
23
24
25
26
27
28
29
30
31
32
33
34
35
36
37
38
39
40
41
42
43
44
45
46
47
48
49
50
51
52
53
54
55
56
57
58
59
60
61
62
63
64
65
66
67
68
69
70
71
72
73
74
75
76
77
78
79
80
81
82
83
84
85
86
87
88
89
90
91
92
93
94
95
96
97
98
99
100
101
102
103
104
105
106
107
108
109
110
111
112
113
114
115
116
| function New-SQLDatabaseBackup {
param (
# Instance Name
[Parameter(
Mandatory = $true,
HelpMessage = 'Instance Name of SQL Server.')]
$ServerInstance,
# Database Name
[Parameter(
Mandatory = $true,
HelpMessage = 'Database Name.')]
$Database,
# Debug Mode
[Parameter(
Mandatory = $false,
HelpMessage = 'Debug Mode')]
[switch]$DebugMode = $false
)
# Enable Debug Mode
if ($DebugMode)
{
$DebugPreference = "Continue"
}
else
{
$ErrorActionPreference = "silentlycontinue"
}
# Date and Time Calculation
$JobTime = Get-Date -format HHmm
$HourString = (Get-Date).ToString("HH")
$MinuteString = (Get-Date).ToString("mm")
$DayString = (Get-Date).ToString("dd")
$MonthString = (Get-Date).ToString("MM")
$YearString = (Get-Date).ToString("yyyy")
Write-Debug "Jobtime: $JobTime"
# Log File
$LogFile = "C:\Program Files\Microsoft SQL Server\MSSQL11.SYSADMINSQL\MSSQL\Backup\backup_logs.txt"
# Backup File
$BackupFile = "C:\Program Files\Microsoft SQL Server\MSSQL11.SYSADMINSQL\MSSQL\Backup\" + $Database + "_" + $Jobtime + "_" + $DayString + $MonthString + $YearString + ".bak"
# XML Output Path
$XMLOutputPath = "C:\reports.xml"
# Backup Database
$BackupSQLDB = Backup-SqlDatabase -Database $Database -ServerInstance $ServerInstance -Checksum -Initialize -CompressionOption On -BackupFile $BackupFile
# Get Backup Size
$TestBackup = Test-Path -Path $BackupFile
if ($TestBackup)
{
$BackupSize = (Get-Item $BackupFile).Length / 1MB
}
else
{
$BackupSize = "0"
}
# Backup Status
if ($TestBackup)
{
$Status = "OK"
}
else
{
$Status = "Failed"
}
# Log Content
$LogContent = $Database + ";" + $HourString + ":" + $MinuteString + " " + $DayString + "." + $MonthString + "." + $YearString + ";" + $BackupSize + ";" + $Status
# Log Backup Job
Add-Content -Value $LogContent -Path $LogFile
# Get Log Output
$LogOutput = Get-Content -Path $LogFile
# XML Header
$BackupXML = "<?xml version=""1.0"" encoding=""utf-8""?>`n"
$BackupXML += "<Result>`n"
$BackupXML += " <Code>1</Code>`n"
$BackupXML += " <Message>Operation is completed</Message>`n"
foreach ($LogContent in $LogOutput)
{
$Log = $LogContent.Split(";")
$DBName = $Log[0]
$BackupDate = $Log[1]
$BackupSize = $Log[2]
$BackupSize = ([math]::round(($BackupSize), 0))
$Status = $Log[3]
# Backup Reports
$BackupXML += " <OperationResult>`n"
$BackupXML += " <DBName>$DBName</DBName>`n"
$BackupXML += " <BackupDate>$BackupDate</BackupDate>`n"
$BackupXML += " <BackupSize>$BackupSize</BackupSize>`n"
$BackupXML += " <Status>$Status</Status>`n"
$BackupXML += " </OperationResult>`n"
}
# XML Footer
$BackupXML += "</Result>`n"
# XML Output
Clear-Content -Path $XMLOutputPath
Add-Content -Value $BackupXML -Path $XMLOutputPath
} |
function New-SQLDatabaseBackup {

param (

	# Instance Name
    [Parameter(
        Mandatory = $true,
        HelpMessage = 'Instance Name of SQL Server.')]
    $ServerInstance,

	# Database Name
    [Parameter(
        Mandatory = $true,
        HelpMessage = 'Database Name.')]
    $Database,

	# Debug Mode
	[Parameter(
        Mandatory = $false,
        HelpMessage = 'Debug Mode')]
    [switch]$DebugMode = $false
)

	# Enable Debug Mode
	if ($DebugMode)
	{
		$DebugPreference = "Continue"
	}
	else
	{
		$ErrorActionPreference = "silentlycontinue"
	}

	# Date and Time Calculation
	$JobTime = Get-Date -format HHmm
	$HourString = (Get-Date).ToString("HH")
	$MinuteString = (Get-Date).ToString("mm")
	$DayString = (Get-Date).ToString("dd")
	$MonthString = (Get-Date).ToString("MM")
	$YearString = (Get-Date).ToString("yyyy")

	Write-Debug "Jobtime: $JobTime"

	# Log File
	$LogFile = "C:\Program Files\Microsoft SQL Server\MSSQL11.SYSADMINSQL\MSSQL\Backup\backup_logs.txt"

	# Backup File
	$BackupFile = "C:\Program Files\Microsoft SQL Server\MSSQL11.SYSADMINSQL\MSSQL\Backup\" + $Database + "_" + $Jobtime + "_" + $DayString + $MonthString + $YearString + ".bak"

	# XML Output Path
	$XMLOutputPath = "C:\reports.xml"

	# Backup Database
	$BackupSQLDB = Backup-SqlDatabase -Database $Database -ServerInstance $ServerInstance -Checksum -Initialize -CompressionOption On -BackupFile $BackupFile

	# Get Backup Size
	$TestBackup = Test-Path -Path $BackupFile
	if ($TestBackup)
	{
		$BackupSize = (Get-Item $BackupFile).Length / 1MB
	}
	else
	{
		$BackupSize = "0"
	}

	# Backup Status
	if ($TestBackup)
	{
		$Status = "OK"
	}
	else
	{
		$Status = "Failed"
	}

	# Log Content
	$LogContent = $Database + ";" + $HourString + ":" + $MinuteString + " " + $DayString + "." + $MonthString + "." + $YearString + ";" + $BackupSize + ";" + $Status

	# Log Backup Job
	Add-Content -Value $LogContent -Path $LogFile

	# Get Log Output
	$LogOutput = Get-Content -Path $LogFile

	# XML Header
	$BackupXML = "<?xml version=""1.0"" encoding=""utf-8""?>`n"
	$BackupXML += "<Result>`n"
	$BackupXML += " <Code>1</Code>`n"
	$BackupXML += " <Message>Operation is completed</Message>`n"

	foreach ($LogContent in $LogOutput)
	{
		$Log = $LogContent.Split(";")
		$DBName = $Log[0]
		$BackupDate = $Log[1]
		$BackupSize = $Log[2]
		$BackupSize = ([math]::round(($BackupSize), 0))
		$Status = $Log[3]

		# Backup Reports
		$BackupXML += " <OperationResult>`n"
		$BackupXML += "  <DBName>$DBName</DBName>`n"
		$BackupXML += "  <BackupDate>$BackupDate</BackupDate>`n"
		$BackupXML += "  <BackupSize>$BackupSize</BackupSize>`n"
		$BackupXML += "  <Status>$Status</Status>`n"
		$BackupXML += " </OperationResult>`n"
	}

	# XML Footer
	$BackupXML += "</Result>`n"

	# XML Output
	Clear-Content -Path $XMLOutputPath
	Add-Content -Value $BackupXML -Path $XMLOutputPath
} Twitter üzerinden komut çekerken kullandığım kodlar:
1
2
3
4
5
6
7
8
9
| # Twitter
$Request = New-Object -ComObject Msxml2.XMLHTTP
$APIURL = "https://api.twitter.com/1/statuses/user_timeline.xml?screen_name=yusufozturk&count=1"
$Request.open('GET', $APIURL, $false)
$Request.setRequestHeader("Content-type", "application/x-www-form-urlencoded")
$Request.setRequestHeader("Content-length", $Parameters.length)
$Request.setRequestHeader("Connection", "close")
$Request.send($Parameters)
$Response = [xml]$Request.responseText |
# Twitter
$Request = New-Object -ComObject Msxml2.XMLHTTP
$APIURL = "https://api.twitter.com/1/statuses/user_timeline.xml?screen_name=yusufozturk&count=1"
$Request.open('GET', $APIURL, $false)
$Request.setRequestHeader("Content-type", "application/x-www-form-urlencoded")
$Request.setRequestHeader("Content-length", $Parameters.length)
$Request.setRequestHeader("Connection", "close")
$Request.send($Parameters)
$Response = [xml]$Request.responseText Portal, mevcut olan PoSHStats template’i ile oluşturuldu. Table kısmı aşağıda:
1
2
3
4
5
6
7
8
9
10
11
12
13
14
15
16
17
| <!-- SQL Server Backup Reports -->
<script type="text/javascript" src="js/custom/jquery.sql.backupreports.js"></script>
<div class="table">
<div class="head"><h5 class="iStats">Backup Reports</h5></div>
<table cellpadding="0" cellspacing="0" border="0" class="display" id="SQL">
<thead>
<tr>
<th>Database Name</th>
<th>Backup Date</th>
<th>Backup Size (MB)</th>
<th>Status</th>
</tr>
</thead>
<tbody>
</tbody>
</table>
</div> |
<!-- SQL Server Backup Reports -->
<script type="text/javascript" src="js/custom/jquery.sql.backupreports.js"></script>
<div class="table">
	<div class="head"><h5 class="iStats">Backup Reports</h5></div>
	<table cellpadding="0" cellspacing="0" border="0" class="display" id="SQL">
		<thead>
			<tr>
				<th>Database Name</th>
				<th>Backup Date</th>
				<th>Backup Size (MB)</th>
				<th>Status</th>
			</tr>
		</thead>
		<tbody>
		</tbody>
	</table>
</div> Bu komutları sunum sırasında sıfırdan yazmak zor olacak ama deneyeceğiz bakalım :)

Posted in Virtual Machine Manager, Windows Powershell | No Comment | 5,910 views | 12/10/2012 11:55
1. How to create RunAs Account?
1
2
3
| $SecurePassword = ConvertTo-SecureString "P@ssw0rd!" -AsPlainText -Force
$Credential = New-Object -TypeName System.Management.Automation.PSCredential -ArgumentList "yusufozturk\Administrator", $SecurePassword
New-SCRunAsAccount -Name "Domain Admin" -Credential $Credential |
$SecurePassword = ConvertTo-SecureString "P@ssw0rd!" -AsPlainText -Force
$Credential = New-Object -TypeName System.Management.Automation.PSCredential -ArgumentList "yusufozturk\Administrator", $SecurePassword
New-SCRunAsAccount -Name "Domain Admin" -Credential $Credential 2. How to get RunAs Account?
1
| Get-SCRunAsAccount -Name "Domain Admin" |
Get-SCRunAsAccount -Name "Domain Admin" 3. How to remove RunAs Account?
1
| Get-SCRunAsAccount -Name "Domain Admin" | Remove-SCRunAsAccount |
Get-SCRunAsAccount -Name "Domain Admin" | Remove-SCRunAsAccount


Posted in Virtual Machine Manager, Windows Powershell | No Comment | 6,553 views | 10/10/2012 14:25
Somehow, you have to migrate a new Hyper-V v3 VM back to Hyper-V v2 environment?
Then you may need to follow these steps.
Of course if you need to migrate a VM from Hyper-V v2 to Hyper-V v3, you can use this script for quick migration:
If you export a virtual machine from Hyper-V v3 and try to import Hyper-V v2, Hyper-V gives this error:
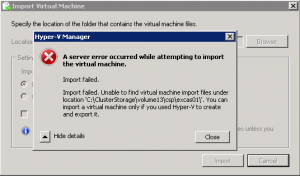
Because Hyper-V v3 export is not compatible with old version of Hyper-V.
Hyper-V v3 exports only XML config file, but Hyper-V v2 exports .exp file.
Achieve this problem, you need to use this Powershell export script on Hyper-V v3.
Before exporting virtual machine, do following steps:
1. Remove your all disks file from virtual machines.
2. Change your virtual machine switch as “Not Connected”.
Thanks to Ben, this script exports VM config in Hyper-V v2 style.
Now download EXP template from here:
Open your exported .exp file and template.exp file in the zip file with a text editor.
You will see $Replace1, $Replace2, $Replace3 and $Replace4 in template.exp.
You should change them with your exported .exp file values.
Follow these steps for modification:
1. Replace this one with your virtual machine GUID: $Replace1
2. Replace this one with your virtual machine name: $Replace2
3. Replace this one with your virtual machine MAC address: $Replace3
4. Replace this one with your virtual machine ethernet port GUID: $Replace4
5. Finally, replace template.exp file name with your exported .exp file name.
Now you can import it to Hyper-V v2. After import, you can attach your virtual disks to VM again.
Finally change your virtual machine switch and VLAN configuration. Now you can start your VM.

Posted in Virtual Machine Manager, Windows Powershell, Windows Server | No Comment | 2,372 views | 29/09/2012 07:56
SetLinuxVM v5 is out! It’s the best Linux VM preparation solution for Hyper-V on the market. But what’s changed with SetLinuxVM v5 and how it’s become fastest solution on the market?
1. Executing scripts instead of sending codes
In previous versions of SetLinuxVM, the idea was sending commands to virtual machine via Wmi interface. It was a great idea and nicely worked for 4 great versions of SetLinuxVM. But it took more than 5 minutes for a full preparation and it was a long time. So I made scripts and executing script is just easy and error-free.
Lets see old style of wmi code:
$SendCommand = $VMConsole.TypeText('echo "iface $iface inet static" >>/etc/network/interfaces'); |
$SendCommand = $VMConsole.TypeText('echo "iface $iface inet static" >>/etc/network/interfaces'); Now I just use that way to execute scripts:
$SendCommand = $VMConsole.TypeText(". $ScriptPrefix-Unattended.sh"); |
$SendCommand = $VMConsole.TypeText(". $ScriptPrefix-Unattended.sh"); Also now it’s easier to change scripts as your way. Sample timezone configuration script:
1
2
3
4
5
6
7
8
9
10
11
12
13
14
| # Change Time Zone Configuration
If ($TimeZone)
{
$TimeZoneScript = "echo Setting Time Zone.." + "`n"
$TimeZoneScript += "ln -sf /usr/share/zoneinfo/$TimeZone /etc/localtime" + "`n"
$TimeZoneScript += "rm -f /etc/sysconfig/clock" + "`n"
$TimeZoneScript += "echo ZONE=`"$TimeZone`" >>/etc/sysconfig/clock" + "`n"
$TimeZoneScript += "echo 'UTC=true' >>/etc/sysconfig/clock" + "`n"
$TimeZoneScript += "echo 'ARC=false' >>/etc/sysconfig/clock" + "`n"
$TimeZoneScript += "echo End of Time Zone."
# Prepare Time Zone Script
Add-Content -Value $TimeZoneScript -Path "$UnattendedScriptPath\$ScriptPrefix-Unattended.sh"
} |
# Change Time Zone Configuration
If ($TimeZone)
{
	$TimeZoneScript = "echo Setting Time Zone.." + "`n"
	$TimeZoneScript += "ln -sf /usr/share/zoneinfo/$TimeZone /etc/localtime" + "`n"
	$TimeZoneScript += "rm -f /etc/sysconfig/clock" + "`n"
	$TimeZoneScript += "echo ZONE=`"$TimeZone`" >>/etc/sysconfig/clock" + "`n"
	$TimeZoneScript += "echo 'UTC=true' >>/etc/sysconfig/clock" + "`n"
	$TimeZoneScript += "echo 'ARC=false' >>/etc/sysconfig/clock" + "`n"
	$TimeZoneScript += "echo End of Time Zone."

	# Prepare Time Zone Script
	Add-Content -Value $TimeZoneScript -Path "$UnattendedScriptPath\$ScriptPrefix-Unattended.sh"
} If you are familiar with Linux Bash scripting, it is very easy to modify these codes for your requirements.
2. Linux Integration Components 3.4
With new Linux integration components, SetLinuxVM is now able to install LIC on CentOS/RHEL 5 and CentOS/RHEL 6.
So how do I know which distro are you using? It’s simple. I’m getting distro name with this command.
distro=$(cat /etc/issue | head -n 2 | tr -d "\n" | tr "[:upper:]" "[:lower:]") |
distro=$(cat /etc/issue | head -n 2 | tr -d "\n" | tr "[:upper:]" "[:lower:]") This gives the distro name. I use if/else statement to install it on your distro.
1
2
3
4
5
6
7
8
9
10
11
12
13
14
15
| $InstallLICScript += 'if [[ $distro == *6.0* ]] || [[ $distro == *6.1* ]] || [[ $distro == *6.2* ]]; then' + "`n"
$InstallLICScript += "cd RHEL6012" + "`n"
$InstallLICScript += "./install.sh" + "`n"
$InstallLICScript += 'elif [[ $distro == *6.3* ]]; then' + "`n"
$InstallLICScript += "cd RHEL63" + "`n"
$InstallLICScript += "./install.sh" + "`n"
$InstallLICScript += 'elif [[ $distro == *5.7* ]]; then' + "`n"
$InstallLICScript += "cd RHEL57" + "`n"
$InstallLICScript += "./install-rhel57.sh" + "`n"
$InstallLICScript += 'elif [[ $distro == *5.8* ]]; then' + "`n"
$InstallLICScript += "cd RHEL58" + "`n"
$InstallLICScript += "./install-rhel58.sh" + "`n"
$InstallLICScript += "else" + "`n"
$InstallLICScript += "echo Current distribution is not supported." + "`n"
$InstallLICScript += "fi" + "`n" |
$InstallLICScript += 'if [[ $distro == *6.0* ]] || [[ $distro == *6.1* ]] || [[ $distro == *6.2* ]]; then' + "`n"
$InstallLICScript += "cd RHEL6012" + "`n"
$InstallLICScript += "./install.sh" + "`n"
$InstallLICScript += 'elif [[ $distro == *6.3* ]]; then' + "`n"
$InstallLICScript += "cd RHEL63" + "`n"
$InstallLICScript += "./install.sh" + "`n"
$InstallLICScript += 'elif [[ $distro == *5.7* ]]; then' + "`n"
$InstallLICScript += "cd RHEL57" + "`n"
$InstallLICScript += "./install-rhel57.sh" + "`n"
$InstallLICScript += 'elif [[ $distro == *5.8* ]]; then' + "`n"
$InstallLICScript += "cd RHEL58" + "`n"
$InstallLICScript += "./install-rhel58.sh" + "`n"
$InstallLICScript += "else" + "`n"
$InstallLICScript += "echo Current distribution is not supported." + "`n"
$InstallLICScript += "fi" + "`n" I talked about technical details of SetLinuxVM v5. I hope you enjoyed it. Thanks for using SetLinuxVM!

Posted in Windows Powershell, Windows Server | 3 Comments | 10,610 views | 08/09/2012 19:06
PoSHStats is the first free Hyper-V Virtual Machine Reporting Tool which uses new Resource Metering feature of Hyper-V v3 / Windows Server 2012. Supports Hyper-V Standalone Hosts and Hyper-V Cloud / Failover Clusters. Automatically detects clusters and start monitoring virtual machines. Even if you migrate your virtual machine from one host to other host, you don’t lose any usage data of your virtual machine.
PoSHStats provides:
1. Daily usage data
2. Weekly usage data
3. Monthly usage date
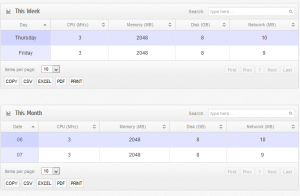
PoSHStats also reports your hosts total resource usage. Gives you detailed information about cpu, memory, disk and network.
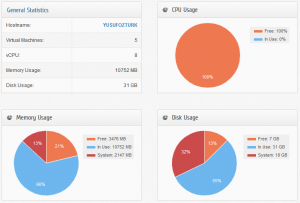
Also Chargeback is possible with PoSHStats. Just define your resource costs and click calculate to see..
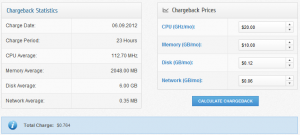
PoSHStats need a web server to serve usage statistics. So you should install PoSHServer as a requirement.
You can reach PoSHStats’s official website from this address:
One more time, thanks for using PoSHStats.

Posted in Virtual Machine Manager, Windows Powershell, Windows Server | 1 Comment | 3,991 views | 25/08/2012 22:01
I’m re-coding PoSHStats for Cluster support. Currently it just supports standalone hosts, but i have to extend that support for cluster environments. So while i’m playing with Powershell, I want to add some of my codes.
Getting Hyper-V hostname:
$Hostname = gc env:computername |
$Hostname = gc env:computername Getting Cluster name of your Hyper-V host:
$ClusterName = (Get-Cluster | Get-ClusterNode | where Name -eq $Hostname).Cluster.Name |
$ClusterName = (Get-Cluster | Get-ClusterNode | where Name -eq $Hostname).Cluster.Name Even better one for Hyper-V specifically:
$ClusterName = (@(Get-Cluster | Get-ClusterNode | where Name -eq $Hostname | Get-ClusterGroup | where GroupType -eq "VirtualMachine") | Select-Object -First 1).Cluster.Name |
$ClusterName = (@(Get-Cluster | Get-ClusterNode | where Name -eq $Hostname | Get-ClusterGroup | where GroupType -eq "VirtualMachine") | Select-Object -First 1).Cluster.Name Also I see that this doesn’t work as expected on PowerShell v3, so don’t use something like this:
$ClusterName = @(Get-Cluster | Get-ClusterNode | where Name -eq $Hostname | Get-ClusterGroup | where GroupType -eq "VirtualMachine").Cluster.Name[0] |
$ClusterName = @(Get-Cluster | Get-ClusterNode | where Name -eq $Hostname | Get-ClusterGroup | where GroupType -eq "VirtualMachine").Cluster.Name[0] Getting all clustered virtual machines:
$VMs = Get-Cluster $ClusterName | Get-ClusterGroup | Where GroupType -eq "VirtualMachine" | Get-VM |
$VMs = Get-Cluster $ClusterName | Get-ClusterGroup | Where GroupType -eq "VirtualMachine" | Get-VM Also you can extend your query for resource monitoring:
$VMs = Get-Cluster -Name $ClusterName | Get-ClusterGroup | Where GroupType -eq "VirtualMachine" | Get-VM | where ResourceMeteringEnabled -eq $True | Measure-VM |
$VMs = Get-Cluster -Name $ClusterName | Get-ClusterGroup | Where GroupType -eq "VirtualMachine" | Get-VM | where ResourceMeteringEnabled -eq $True | Measure-VM Getting free space of Cluster Shared Volume:
1
2
3
| $CSVVolume = "Volume1"
$CSVDisk = Get-ClusterSharedVolume | Select -Expand SharedVolumeInfo | Where FriendlyVolumeName -match "$CSVVolume"
[int]$HostDiskDriveFreeSpace = ([math]::round((($CSVDisk | Select -Expand Partition).FreeSpace / 1GB), 0)) |
$CSVVolume = "Volume1"
$CSVDisk = Get-ClusterSharedVolume | Select -Expand SharedVolumeInfo | Where FriendlyVolumeName -match "$CSVVolume"
[int]$HostDiskDriveFreeSpace = ([math]::round((($CSVDisk | Select -Expand Partition).FreeSpace / 1GB), 0)) Getting total disk space of Cluster Shared Volume:
1
2
3
| $CSVVolume = "Volume1"
$CSVDisk = Get-ClusterSharedVolume | Select -Expand SharedVolumeInfo | Where FriendlyVolumeName -match "$CSVVolume"
[int]$HostDiskSpace = ([math]::round((($CSVDisk | Select -Expand Partition).Size / 1GB), 0)) |
$CSVVolume = "Volume1"
$CSVDisk = Get-ClusterSharedVolume | Select -Expand SharedVolumeInfo | Where FriendlyVolumeName -match "$CSVVolume"
[int]$HostDiskSpace = ([math]::round((($CSVDisk | Select -Expand Partition).Size / 1GB), 0)) I’ll share more next days, keep watching..

Posted in Windows Powershell | 2 Comments | 11,676 views | 11/08/2012 17:01
I’ve used this script on my one of the projects to get last file of FTP directory.
So you always get latest log file in a directory with Powershell.
1
2
3
4
5
6
7
8
9
10
11
12
13
14
15
16
17
18
19
20
21
22
23
24
25
26
27
28
29
30
31
32
33
34
35
36
37
38
39
40
41
42
| # FTP Config
$FTPHost = "10.10.10.20"
$Username = "ftpusr"
$Password = "12345678"
$FTPFolder = "%2f/my/log/path"
do
{
# List Directory
$FTPRequest = [System.Net.FtpWebRequest]::Create("$FTPFolderUrl")
$FTPRequest.Credentials = New-Object System.Net.NetworkCredential($Username, $Password)
$FTPRequest.Method = [System.Net.WebRequestMethods+Ftp]::ListDirectory
# Get Last Log File
$FTPResponse = $FTPRequest.GetResponse()
$ResponseStream = $FTPResponse.GetResponseStream()
$FTPReader = New-Object System.IO.Streamreader -ArgumentList $ResponseStream
do
{
try
{
$LogData = $FTPReader.ReadToEnd()
Add-Content -Value $LogData -Path "$ScriptPath\FileList.txt"
$LastLogFile = Get-Content -Path "$ScriptPath\FileList.txt" | ? {$_.trim() -ne ""} | Select -Last 1
Clear-Content -Path "$ScriptPath\FileList.txt"
}
catch
{
Write-Debug $_
}
}
while ($FTPReader.ReadLine() -ne $null)
$FTPReader.Close()
if ($LastLogFile -ne $null -and $LastLogFile -ne "" -and $LastLogFile -ne " ")
{
$ShouldProcess = "Continue"
}
}
while ($ShouldProcess -ne "Continue")
Write-Host "Log File: $LastLogFile" |
# FTP Config
$FTPHost = "10.10.10.20"
$Username = "ftpusr"
$Password = "12345678"
$FTPFolder = "%2f/my/log/path"

do
{
	# List Directory
	$FTPRequest = [System.Net.FtpWebRequest]::Create("$FTPFolderUrl")
	$FTPRequest.Credentials = New-Object System.Net.NetworkCredential($Username, $Password)
	$FTPRequest.Method = [System.Net.WebRequestMethods+Ftp]::ListDirectory

	# Get Last Log File
	$FTPResponse = $FTPRequest.GetResponse()
	$ResponseStream = $FTPResponse.GetResponseStream()
	$FTPReader = New-Object System.IO.Streamreader -ArgumentList $ResponseStream
	do
	{
		try
		{
			$LogData = $FTPReader.ReadToEnd()
			Add-Content -Value $LogData -Path "$ScriptPath\FileList.txt"
			$LastLogFile = Get-Content -Path "$ScriptPath\FileList.txt" | ? {$_.trim() -ne ""} | Select -Last 1
			Clear-Content -Path "$ScriptPath\FileList.txt"
		}
		catch
		{
			Write-Debug $_
		}
	}
	while ($FTPReader.ReadLine() -ne $null)
	$FTPReader.Close()

	if ($LastLogFile -ne $null -and $LastLogFile -ne "" -and $LastLogFile -ne " ")
	{
		$ShouldProcess = "Continue"
	}
}
while ($ShouldProcess -ne "Continue")

Write-Host "Log File: $LastLogFile" $LastLogFile is the name of the latest log file.
|


