Posted in
Virtual Machine Manager,
Windows Powershell,
Windows Server |
No Comment | 2,374 views | 29/09/2012 07:56
SetLinuxVM v5 is out! It’s the best Linux VM preparation solution for Hyper-V on the market. But what’s changed with SetLinuxVM v5 and how it’s become fastest solution on the market?
1. Executing scripts instead of sending codes
In previous versions of SetLinuxVM, the idea was sending commands to virtual machine via Wmi interface. It was a great idea and nicely worked for 4 great versions of SetLinuxVM. But it took more than 5 minutes for a full preparation and it was a long time. So I made scripts and executing script is just easy and error-free.
Lets see old style of wmi code:
$SendCommand = $VMConsole.TypeText('echo "iface $iface inet static" >>/etc/network/interfaces'); |
$SendCommand = $VMConsole.TypeText('echo "iface $iface inet static" >>/etc/network/interfaces');
Now I just use that way to execute scripts:
$SendCommand = $VMConsole.TypeText(". $ScriptPrefix-Unattended.sh"); |
$SendCommand = $VMConsole.TypeText(". $ScriptPrefix-Unattended.sh");
Also now it’s easier to change scripts as your way. Sample timezone configuration script:
1
2
3
4
5
6
7
8
9
10
11
12
13
14
| # Change Time Zone Configuration
If ($TimeZone)
{
$TimeZoneScript = "echo Setting Time Zone.." + "`n"
$TimeZoneScript += "ln -sf /usr/share/zoneinfo/$TimeZone /etc/localtime" + "`n"
$TimeZoneScript += "rm -f /etc/sysconfig/clock" + "`n"
$TimeZoneScript += "echo ZONE=`"$TimeZone`" >>/etc/sysconfig/clock" + "`n"
$TimeZoneScript += "echo 'UTC=true' >>/etc/sysconfig/clock" + "`n"
$TimeZoneScript += "echo 'ARC=false' >>/etc/sysconfig/clock" + "`n"
$TimeZoneScript += "echo End of Time Zone."
# Prepare Time Zone Script
Add-Content -Value $TimeZoneScript -Path "$UnattendedScriptPath\$ScriptPrefix-Unattended.sh"
} |
# Change Time Zone Configuration
If ($TimeZone)
{
	$TimeZoneScript = "echo Setting Time Zone.." + "`n"
	$TimeZoneScript += "ln -sf /usr/share/zoneinfo/$TimeZone /etc/localtime" + "`n"
	$TimeZoneScript += "rm -f /etc/sysconfig/clock" + "`n"
	$TimeZoneScript += "echo ZONE=`"$TimeZone`" >>/etc/sysconfig/clock" + "`n"
	$TimeZoneScript += "echo 'UTC=true' >>/etc/sysconfig/clock" + "`n"
	$TimeZoneScript += "echo 'ARC=false' >>/etc/sysconfig/clock" + "`n"
	$TimeZoneScript += "echo End of Time Zone."

	# Prepare Time Zone Script
	Add-Content -Value $TimeZoneScript -Path "$UnattendedScriptPath\$ScriptPrefix-Unattended.sh"
}
If you are familiar with Linux Bash scripting, it is very easy to modify these codes for your requirements.
2. Linux Integration Components 3.4
With new Linux integration components, SetLinuxVM is now able to install LIC on CentOS/RHEL 5 and CentOS/RHEL 6.
So how do I know which distro are you using? It’s simple. I’m getting distro name with this command.
distro=$(cat /etc/issue | head -n 2 | tr -d "\n" | tr "[:upper:]" "[:lower:]") |
distro=$(cat /etc/issue | head -n 2 | tr -d "\n" | tr "[:upper:]" "[:lower:]")
This gives the distro name. I use if/else statement to install it on your distro.
1
2
3
4
5
6
7
8
9
10
11
12
13
14
15
| $InstallLICScript += 'if [[ $distro == *6.0* ]] || [[ $distro == *6.1* ]] || [[ $distro == *6.2* ]]; then' + "`n"
$InstallLICScript += "cd RHEL6012" + "`n"
$InstallLICScript += "./install.sh" + "`n"
$InstallLICScript += 'elif [[ $distro == *6.3* ]]; then' + "`n"
$InstallLICScript += "cd RHEL63" + "`n"
$InstallLICScript += "./install.sh" + "`n"
$InstallLICScript += 'elif [[ $distro == *5.7* ]]; then' + "`n"
$InstallLICScript += "cd RHEL57" + "`n"
$InstallLICScript += "./install-rhel57.sh" + "`n"
$InstallLICScript += 'elif [[ $distro == *5.8* ]]; then' + "`n"
$InstallLICScript += "cd RHEL58" + "`n"
$InstallLICScript += "./install-rhel58.sh" + "`n"
$InstallLICScript += "else" + "`n"
$InstallLICScript += "echo Current distribution is not supported." + "`n"
$InstallLICScript += "fi" + "`n" |
$InstallLICScript += 'if [[ $distro == *6.0* ]] || [[ $distro == *6.1* ]] || [[ $distro == *6.2* ]]; then' + "`n"
$InstallLICScript += "cd RHEL6012" + "`n"
$InstallLICScript += "./install.sh" + "`n"
$InstallLICScript += 'elif [[ $distro == *6.3* ]]; then' + "`n"
$InstallLICScript += "cd RHEL63" + "`n"
$InstallLICScript += "./install.sh" + "`n"
$InstallLICScript += 'elif [[ $distro == *5.7* ]]; then' + "`n"
$InstallLICScript += "cd RHEL57" + "`n"
$InstallLICScript += "./install-rhel57.sh" + "`n"
$InstallLICScript += 'elif [[ $distro == *5.8* ]]; then' + "`n"
$InstallLICScript += "cd RHEL58" + "`n"
$InstallLICScript += "./install-rhel58.sh" + "`n"
$InstallLICScript += "else" + "`n"
$InstallLICScript += "echo Current distribution is not supported." + "`n"
$InstallLICScript += "fi" + "`n"
I talked about technical details of SetLinuxVM v5. I hope you enjoyed it. Thanks for using SetLinuxVM!
Posted in
Virtual Machine Manager,
Windows Server |
No Comment | 3,792 views | 15/09/2012 21:45
Hyper-V üzerinde çalışan Linux sanal makineler için olan Linux Integration Services’in 3.4 versiyonu yayınlandı. Yeni sürüm ile birlikte artık Linux sanal sunucularda 4 vCPU’dan fazla vCPU kullanabilmek mümkün hale geldi.
Artık Linux için bir limit bulunmuyor, sanal vCPU limitini artık Hyper-V limitleri belirliyor. Windows Server 2012 ve Hyper-V Server 2012 ile birlikte Linux sanal sunucularınıza 64 vCPU verebilirsiniz. Ayrıca bu sürüm ile birlikte mouse/fare kullanımına tam destek geliyor.
Linux Integration Services v3.4 ile desteklenen Linux dağıtımları:
- Red Hat Enterprise Linux 5.7, 5.8, 6.0-6.3 x86 ve x64
- CentOS 5.7, 5.8, 6.0-6.3 x86 ve x64
Ayrıca IC ile elde edebileceğiniz diğer önemli destekler:
- Hot Add Disk (SCSI Controller üzerinden)
- Time Sync – Saat eşitleme Sentetik Network Adaptörü
- Integrated Shutdown (Sunucu kapatma)
- VLAN tagging (Sentetik network adaptörü üzerinden)
- Live Migration desteği
- Jumbo Frames (1500 bytes üzeri artık kullanılabilir)
Bu sürüm ile hala gelmeyen özellikler:
- Integration services: Volume Snapshot Backup
- Networking: TCP Offload
Hyper-V Linux Integration Services v3.4’ü indirmek için bu linki kullanabilirsiniz.
Posted in
Windows Powershell,
Windows Server |
3 Comments | 10,611 views | 08/09/2012 19:06
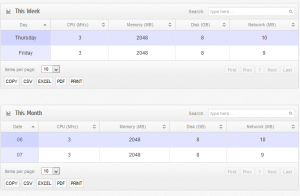
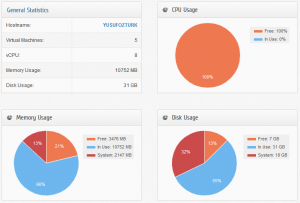
PoSHStats is the first free Hyper-V Virtual Machine Reporting Tool which uses new Resource Metering feature of Hyper-V v3 / Windows Server 2012. Supports Hyper-V Standalone Hosts and Hyper-V Cloud / Failover Clusters. Automatically detects clusters and start monitoring virtual machines. Even if you migrate your virtual machine from one host to other host, you don’t lose any usage data of your virtual machine.
PoSHStats provides:
1. Daily usage data
2. Weekly usage data
3. Monthly usage date

PoSHStats also reports your hosts total resource usage. Gives you detailed information about cpu, memory, disk and network.

Also Chargeback is possible with PoSHStats. Just define your resource costs and click calculate to see..

PoSHStats need a web server to serve usage statistics. So you should install PoSHServer as a requirement.
You can reach PoSHStats’s official website from this address:
One more time, thanks for using PoSHStats.
Posted in
Windows Server |
No Comment | 3,656 views | 08/09/2012 18:53
This is an example config creator for MRTG.
1
2
3
4
5
6
7
8
9
10
11
12
13
14
15
16
17
18
| function New-MRTG
{
param ($VLAN, $ID)
$Value1 = "######################################################################"
$Value2 = "Target[VCLOUDVLAN" + $VLAN + "]:" + $ID + ":snmpname@192.168.2.1:::::2"
$Value3 = "Directory[VCLOUDVLAN" + $VLAN + "]:fortigate"
$Value4 = "MaxBytes[VCLOUDVLAN" + $VLAN + "]:9999999999"
$Value5 = "Withpeak[VCLOUDVLAN" + $VLAN + "]:wmy"
$Value6 = "Title[VCLOUDVLAN" + $VLAN + "]:Traffic Analysis for --VCLOUDVLAN" + $VLAN
$Value7 = "PageTop[VCLOUDVLAN" + $VLAN + "]:<H1>Traffic Analysis for VCLOUDVLAN" + $VLAN + "</H1>"
Add-Content -Value $Value1 -Path "C:\MRTG.cfg"
Add-Content -Value $Value2 -Path "C:\MRTG.cfg"
Add-Content -Value $Value3 -Path "C:\MRTG.cfg"
Add-Content -Value $Value4 -Path "C:\MRTG.cfg"
Add-Content -Value $Value5 -Path "C:\MRTG.cfg"
Add-Content -Value $Value6 -Path "C:\MRTG.cfg"
Add-Content -Value $Value7 -Path "C:\MRTG.cfg"
} |
function New-MRTG
{
param ($VLAN, $ID)
	$Value1 = "######################################################################"
	$Value2 = "Target[VCLOUDVLAN" + $VLAN + "]:" + $ID + ":snmpname@192.168.2.1:::::2"
	$Value3 = "Directory[VCLOUDVLAN" + $VLAN + "]:fortigate"
	$Value4 = "MaxBytes[VCLOUDVLAN" + $VLAN + "]:9999999999"
	$Value5 = "Withpeak[VCLOUDVLAN" + $VLAN + "]:wmy"
	$Value6 = "Title[VCLOUDVLAN" + $VLAN + "]:Traffic Analysis for  --VCLOUDVLAN" + $VLAN
	$Value7 = "PageTop[VCLOUDVLAN" + $VLAN + "]:<H1>Traffic Analysis for VCLOUDVLAN" + $VLAN + "</H1>"
	Add-Content -Value $Value1 -Path "C:\MRTG.cfg"
	Add-Content -Value $Value2 -Path "C:\MRTG.cfg"
	Add-Content -Value $Value3 -Path "C:\MRTG.cfg"
	Add-Content -Value $Value4 -Path "C:\MRTG.cfg"
	Add-Content -Value $Value5 -Path "C:\MRTG.cfg"
	Add-Content -Value $Value6 -Path "C:\MRTG.cfg"
	Add-Content -Value $Value7 -Path "C:\MRTG.cfg"
}
Usage of this function: “New-MRTG -VLAN 2232 -ID 512”


