Posted in
Windows Powershell |
No Comment | 3,013 views | 17/02/2012 07:38
As you may know, I’ve recently published new version of SetLinuxVM. It’s currently in version 3. There are many great improvements but specificly I want to talk about Wait-VMReboot and Wait-VMProcess.
The biggest challenge in SetLinuxVM v2 was reboot process. There was a static time wait to cover reboot and service restart scenarios. But reboot and service restart duration may differ and depends on Distro, kernel and workloads on VM. If SetLinuxVM sends a command while Linux VM is rebooting, that command will probably fail. So SetLinuxVM should wait enough to Linux VM gets ready to login screen. But that wait has very big impact on provisioning duration.
So what SetLinuxVM v3 is doing? It does same thing as human eyes. Actually we are watching VM reboot process and if we see login screen, then we type our root username and password. So I did same process on SetLinuxVM. SetLinuxVM captures screen of Linux VM every 10 seconds and checks differences between two capture. So let’s give an example for this process.
1. I send a reboot signal to Linux VM.
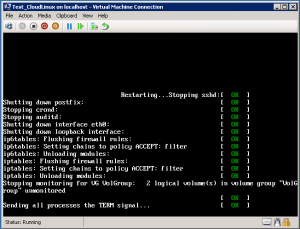
2. I capture my first screenshot. VM is at the beginnnig of reboot process.
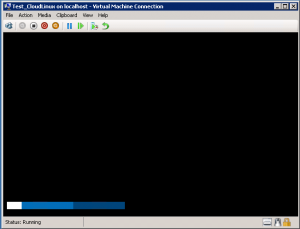
$State1 = (Watch-LinuxVM -VMName $VMName -VMHost $VMHost -VMCluster $VMCluster -VMMServer $VMMServer -WmiHost $WmiHost).ImageData |
$State1 = (Watch-LinuxVM -VMName $VMName -VMHost $VMHost -VMCluster $VMCluster -VMMServer $VMMServer -WmiHost $WmiHost).ImageData
3. After 10 seconds, I capture another screenshot, almost at the end of procces.
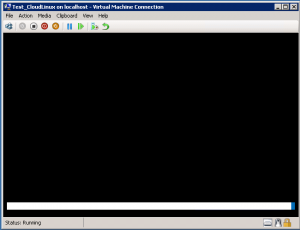
$State2 = (Watch-LinuxVM -VMName $VMName -VMHost $VMHost -VMCluster $VMCluster -VMMServer $VMMServer -WmiHost $WmiHost).ImageData |
$State2 = (Watch-LinuxVM -VMName $VMName -VMHost $VMHost -VMCluster $VMCluster -VMMServer $VMMServer -WmiHost $WmiHost).ImageData
4. If I check State1 and State2, Powershell tells me that they are not same. So after 10 seconds I capture another screenshot.
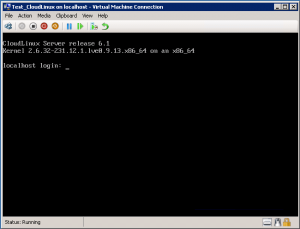
$State1 = (Watch-LinuxVM -VMName $VMName -VMHost $VMHost -VMCluster $VMCluster -VMMServer $VMMServer -WmiHost $WmiHost).ImageData |
$State1 = (Watch-LinuxVM -VMName $VMName -VMHost $VMHost -VMCluster $VMCluster -VMMServer $VMMServer -WmiHost $WmiHost).ImageData
5. I capture a new screenshot after 10 seconds.

$State2 = (Watch-LinuxVM -VMName $VMName -VMHost $VMHost -VMCluster $VMCluster -VMMServer $VMMServer -WmiHost $WmiHost).ImageData |
$State2 = (Watch-LinuxVM -VMName $VMName -VMHost $VMHost -VMCluster $VMCluster -VMMServer $VMMServer -WmiHost $WmiHost).ImageData
6. If I check State1 and State2, Powershell tells me that they are identical! So that means VM is finished reboot process or stucked in somewhere. Due to eliminate stucked situations, I do this verification twice. After second verification, if State1 and State2 is idential then SetLinuxVM says that VM is fully rebooted. But that’s just an assume. VM may be stucked forever in reboot process but there is nothing SetLinuxVM can do. You should fix that as a System Administrator.
You can use Wait-VMReboot like this:
Wait-VMReboot -VMName "CentOS01" |
Wait-VMReboot -VMName "CentOS01"
I hope you like it! Thanks for reading..
Posted in
Windows Powershell |
No Comment | 5,229 views | 14/02/2012 02:14
Hello,
Info: SetLinuxVM is now under GPLv2
After number of bug fixes, improvements and new functionalities, Set-LinuxVM reached version 3.0 stable.
Fixed bugs:
1) Suse Enterprise network script – path issue.
2) Debian LVM issue
3) Ubuntu network issue.
4) Suse Enterprise hostname issue.
5) CentOS hostname issue.
6) Suse Enterprise mandatory networks issue.
7) Dismount Linux IC issue
8) Determining reboot and service restarts
9) Ubuntu log off issue
New functionalities:
1) “Distro” is not a requirement. You don’t need to provide Distro name of Linux VM anymore! SetLinuxVM can detects Linux distro and execute commands specificly for that distro. But I still suggest you to use “Distro” to decrease provisioning duration.
2) “Network connectivity” is not a requirement. In previous versions, you need network connectivity inside the VM to install LIC. Now SetLinuxVM v3 uses Hyper-V LIC v3.2 ISO for LIC installation. We just mount ISO to VM and ready to go..
3) Secondary IP Support! Now you can add multiple Ip addresses to your Linux VM.
4) Backing-up VM Config! In previous versions, SetLinuxVM was removing config files to set new config files. Now SetLinuxVM v3 simply creates a backup directory in /home and moves all old config files in it by adding .bak extension. So if you do something wrong, just use backups of the config!
5) New Artificial Intelligence (AI) for SetLinuxVM: Wait-VMReboot and Wait-VMProcess. Now, SetLinuxVM understands virtual machine reboot process. In previous version, we were using static start-sleep durations to wait enough for reboot process completion. But now, we don’t use any static durations to continue VM provisioning! SetLinuxVM watch VM activies and decide if VM is finished rebooting.
6) Seperated provisioning support! In previous versions; hostname and ip-network information are required. Now with SetLinuxVM v3, you can just change hostname or extend LVM.
7) No static values in SetLinuxVM anymore! SetLinuxVM just reads Linux configuration and execute commands with that.
8) Secured with Code Signing Certificate from GlobalSign.
9) Console simulation for Linux VMs called Open-VMConsole. Now you can copy/past into Linux VMs by using Open-VMConsole. It simulates Linux console and lets you copy/past your commands.
10) Hyper-V CLuster support! Now we use Failover Cluster module to search VMs in Cluster nodes. This is one of the best feature if you don’t use SCVMM.
Removed Functionalities:
1) Automatic updates for SetLinuxVM. I thought that may not be safe for customized scripts.
2) Hyper-V LIC v2.1 support! SetLinuxVM v3 only supports Hyper-V LIC v3.2. But SetLinuxVM is still able to provision Redhat/CentOS 5 even with LIC v2.1.
3) Debian and Ubuntu integration solutions due to performans and stability problems.
General functionalities:
1) Unattended IP, Hostname and DNS configuration for Linux VMs.
2) Automatic Linux integration components installation.
3) Multi Distro Support: Debian, Ubuntu, Centos, Fedora, Redhat, Suse and CloudLinux!
4) Automatic CPanel and Parallels Plesk installation.
5) Linux VM Template support
6) Hyper-V support! You don’t need SCVMM to use this script.
7) Multiple Hyper-V and SCVMM host support.
8) Automatic Emulated NIC to Synthetic NIC support.
9) No need to internet connection (SSH access etc.) or additional changes on VM.
10) Custom Answer File support! You can execute your own scripts.
Copyright (C) 2012 Yusuf Ozturk
This program is free software; you can redistribute it and/or modify it under the terms of the GNU General Public License as published by the Free Software Foundation; either version 2 of the License, or (at your option) any later version.
This program is distributed in the hope that it will be useful, but WITHOUT ANY WARRANTY; without even the implied warranty of MERCHANTABILITY or FITNESS FOR A PARTICULAR PURPOSE. See the GNU General Public License for more details.
You should have received a copy of the GNU General Public License along with this program; if not, write to the Free Software Foundation, Inc., 59 Temple Place, Suite 330, Boston, MA 02111-1307 USA
Download:
Donate: Thanks to support this open source project!
Usage:
1. First, you should allow signed Powershell scripts:
Set-ExecutionPolicy AllSigned |
Set-ExecutionPolicy AllSigned
2. Extract file and move “SetLinuxVM” directory under to “C:\Windows\System32\WindowsPowerShell\v1.0\Modules”.
3. Import as a module:
4. That’s it. To see how to use it:
Get-help Set-LinuxVM -full |
Get-help Set-LinuxVM -full
5. Follow to instructions.
You can search in my blog for how to create Linux VM templates!


